Building My Desk — Part One: The Frame
👋 Hello reader, this blog post has aged 10 years since I originally wrote it in 2013. That's about 70 “internet years” you know, so it's probably quite stale by now and may not reflect my current thinking. I am happy to keep it here for archival purposes, but please reach out to me if something feels off or if you're relying on it for any serious purpose.
Thanks,
Patrick
Over the last week and a half, I designed and constructed a new desk for my home office. If you follow me on Instagram you might have seen some of the progress photos that I’ve been posting. I wanted to document my experience building this thing and what learned along the way. This was not only one of my favorite construction projects from a process perspective, but also my favorite finished product.
First, a little backstory… A few years ago, I saw this post on Apartment Therapy about constructing shelving from steel plumbing pipe. I instantly latched on to this idea and added it to the list of projects that I wanted to take on in my then—new house. If you’re a home-owner, you know that this list quickly gets re-prioritized in favor of things leaking, mold growing, and whatever else requires immediate (and usually expensive) repair. Needless to say, the pipe-shelving project had been in the back of my head for a few years.
About a month ago, I stumbled upon Jessica’s blog through a link that someone posted on Twitter about some of her work at Engine Yard. I then found my way to this very detailed post about how she constructed a standing desk, using similar materials and construction methods as the shelving unit mentioned above. This immediately got the gears turning in my head and I spent a few days imagining how I could construct something like this.

Unlike Jessica’s desk, I didn’t want mine to be that of the standing variety. I did some research and found a few photos of other sitting desks that people had made out of plumbing pipe. Based on these photos and Jessica’s design, I sketched out some plans borrowing ideas from both.
Next, I took an inventory of everything I would need to execute this plan and headed off to Lowe’s. As Jessica noted, Lowe’s will cut and thread the pipes for you right in the aisle. They also have pre-cut and pre-threaded pipes from about 1 inch through 20 inches in length.
Parts required to build the frame
All parts galvanized steel, 1” diameter and the fittings made by Mueller
Fittings:
- 5 x Flanges
- 11 x “T” Joints
- 6 x Elbow Joints
- 4 x End Caps
- 16 x ‘close’ pipe nipple
- 1 x 4” pipe nipple
Pipes:
- 4 x 21.5”
- 2 x 28”
- 4 x 18”
Finishing Products:
- 1 bottle of spray degreaser, citrus scented
- 1 can of Rustoleum spray metal primer
- 1 can of Rustoleum matte black spray paint
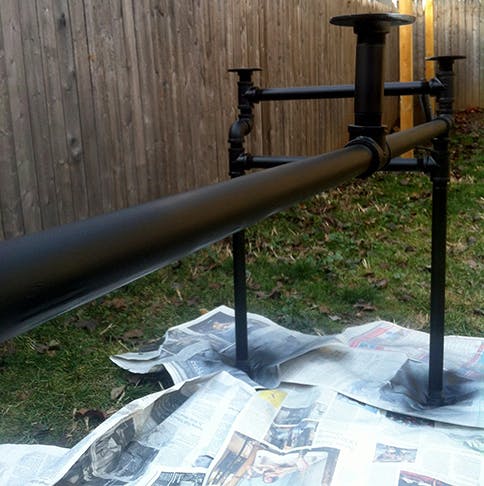
When I got home, I decided to clean all the parts and quickly assemble the frame (without measuring or really tightening anything) just to make sure I had all the pieces I needed. The saw and the pipe threading machine at Lowe’s gets the pipes pretty greasy, so I used some spray degreaser and rags to clean each piece and remove any stickers.
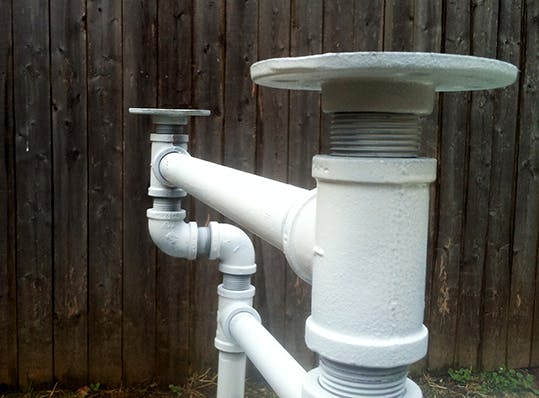
The next weekend, it was time to prime and paint the frame. I reconstructed the frame and measured all the fittings, legs, and connectors to ensure I had a symmetrical table before it was too late to turn back. I put on one coat of primer, let it dry for about 2 hours, and then one coat of spray paint. This actually used up the entire can of paint and if I could do it again, I would have bought another can for a second coat.